
Wednesday, June 24, 2009


Monday, June 22, 2009
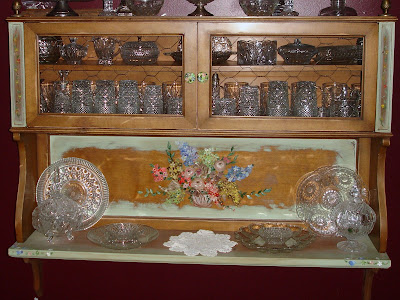
Free standing hutch
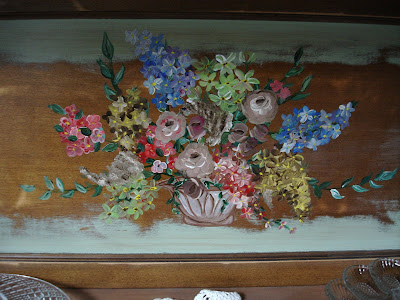
This was the top of a small hutch. There was no shelf. I got a 12x1 inch piece of wood and cut it to size. Adding the brackets below to complete the finished look. I also added molding around the shelf for a detailed finished look. I was unable to get both stains to match so I did a green paint wash on the shelf’s edge and the edges of the back splash, with decorative one stroke flower arrangement painting in the center.


Saturday, June 13, 2009


Wednesday, June 10, 2009


Sunday, June 7, 2009
A shabby Chest transformed into a wonderful decorative piece of furniture.
This was an antique chest with no drawers. I could not find matching drawers so I decided to make doors. I measured and cut the doors out of a ¾ inch oak. I then painted 1x1 strips of wood black, cut to size and screwed to the door giving them a finished edge.
To make the inside more functional I added a slide out drawer using kitchen drawer brackets and 3/4 inch oak piece of wood. The back is a piece of ¾ inch oak. I measured the width of the chest and cut the oak wood to fit nicely in back. I then used a Jig saw and cut the curves on top. I added molding around the edges to give it a finished look and it also makes the wood look very thick. To add more stability and a decorative look I added the side brackets. I connected them to the back piece and the chest. I measured out all the shelving and the wooden beams that I cut from a wooden crib. I painted the beams and the shelving black before attaching them to the back. I attached the back with 1x1 strips of wood going from the top all the way down to the bottom of the legs. Before attaching the shelves, I stained everything to make sure it all matched in color. The ending result.


To make the inside more functional I added a slide out drawer using kitchen drawer brackets and 3/4 inch oak piece of wood. The back is a piece of ¾ inch oak. I measured the width of the chest and cut the oak wood to fit nicely in back. I then used a Jig saw and cut the curves on top. I added molding around the edges to give it a finished look and it also makes the wood look very thick. To add more stability and a decorative look I added the side brackets. I connected them to the back piece and the chest. I measured out all the shelving and the wooden beams that I cut from a wooden crib. I painted the beams and the shelving black before attaching them to the back. I attached the back with 1x1 strips of wood going from the top all the way down to the bottom of the legs. Before attaching the shelves, I stained everything to make sure it all matched in color. The ending result.


Friday, June 5, 2009
A great way to showcase pictures
This is an old house window made out of wood. I wanted to prepare this window for a fresh new coat of paint. I started by scraping and sanding all to old flaky and chipped paint off. When I started to sand it, it reviled all these wonderful colors. It was the history of that window and how many times it has been painted over the past seventy-five years. I decided not to paint it, but to leave it showing all the history.
I then got some etching paint. I taped down a stencil to the class and applied the etching paint as directed on the jar. When I removed the paint and the stencil I had this great etching. I printed out some great summer photos and applied them to the glass I didn't etch.
This is defiantly a one of a kind window.

.JPG)

Subscribe to:
Posts (Atom)